- Points of Interest
- Class Positions


The coast is intended for mid-armored, fast, and maneuverable vehicles.


The shallow part of the river cannot be called a full-fledged direction, but it can play an important role in the tactics of outflanking the enemy.


A subdirection for heavily armored vehicles. Elevated positions that allow you to control most of the map.


The rocky gorge is well suited for the gameplay of heavily armored vehicles. It is well protected from SPG fire, as well as from flank attacks by the enemy.


The terrain of the coast with oyster farms is very uneven. Vehicles with good gun depression angles can fully unlock their potential here.


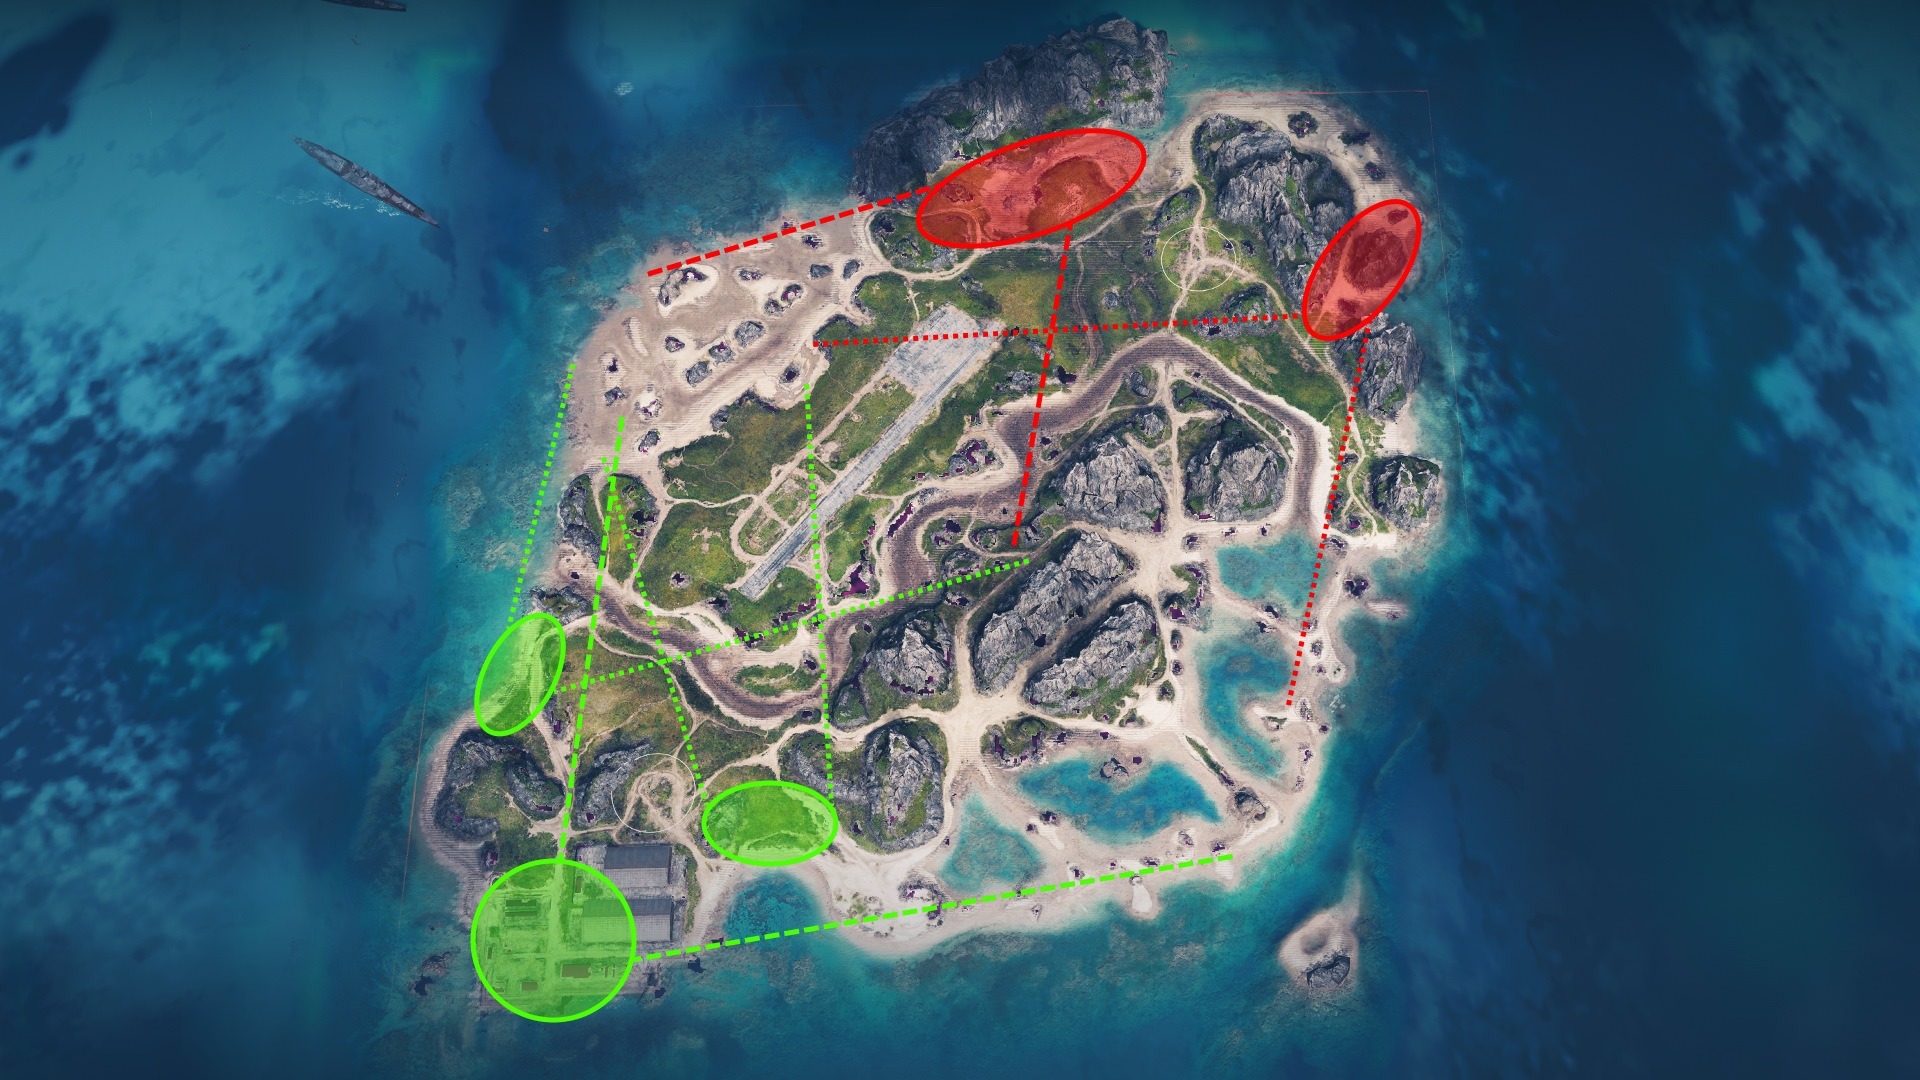
Positions with thick vegetation for long-range sniping. These are good for controlling the adjacent areas and repelling flank attacks.

Positions with thick vegetation for long-range sniping. These are good for controlling the adjacent areas and repelling flank attacks.

Positions with thick vegetation for long-range sniping. These are good for controlling the adjacent areas and repelling flank attacks.

Positions with thick vegetation for long-range sniping. These are good for controlling the adjacent areas and repelling flank attacks.

Positions with thick vegetation for long-range sniping. These are good for controlling the adjacent areas and repelling flank attacks.

Positions with thick vegetation for long-range sniping. These are good for controlling the adjacent areas and repelling flank attacks.


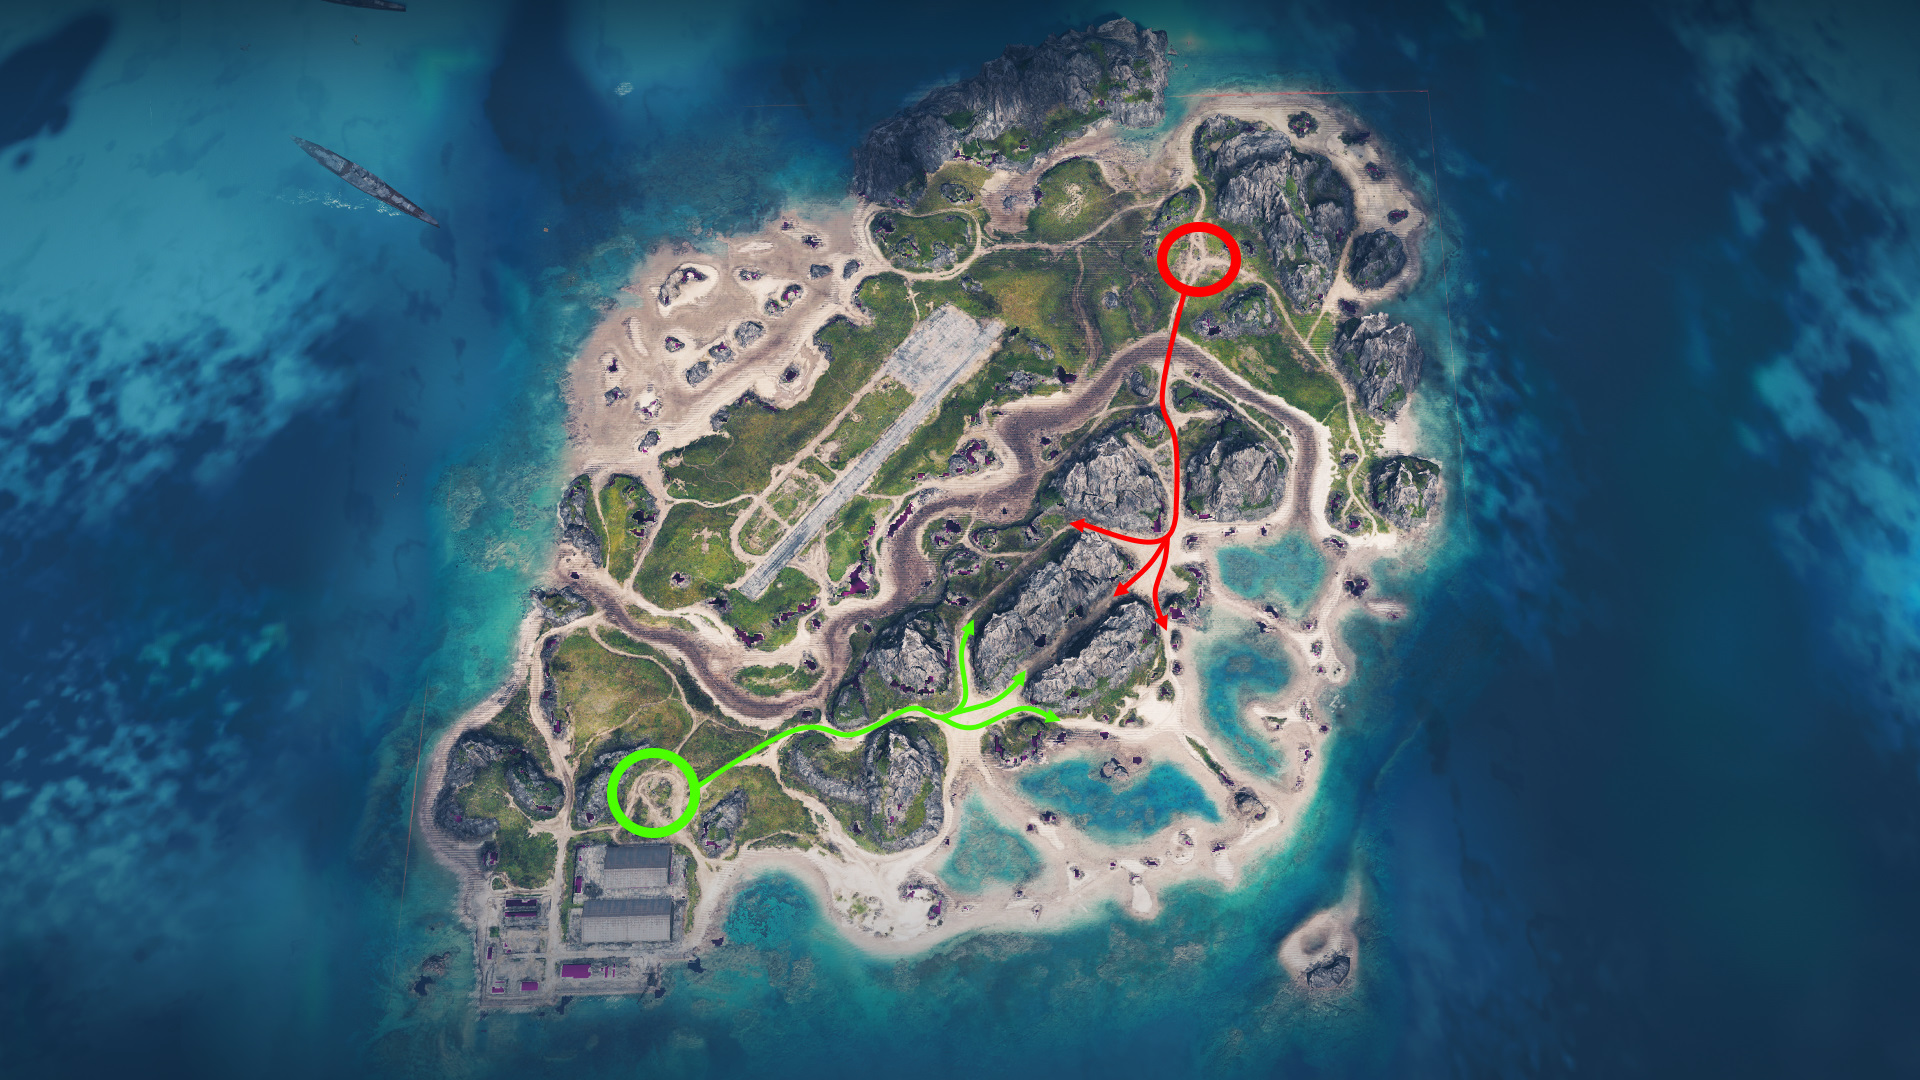
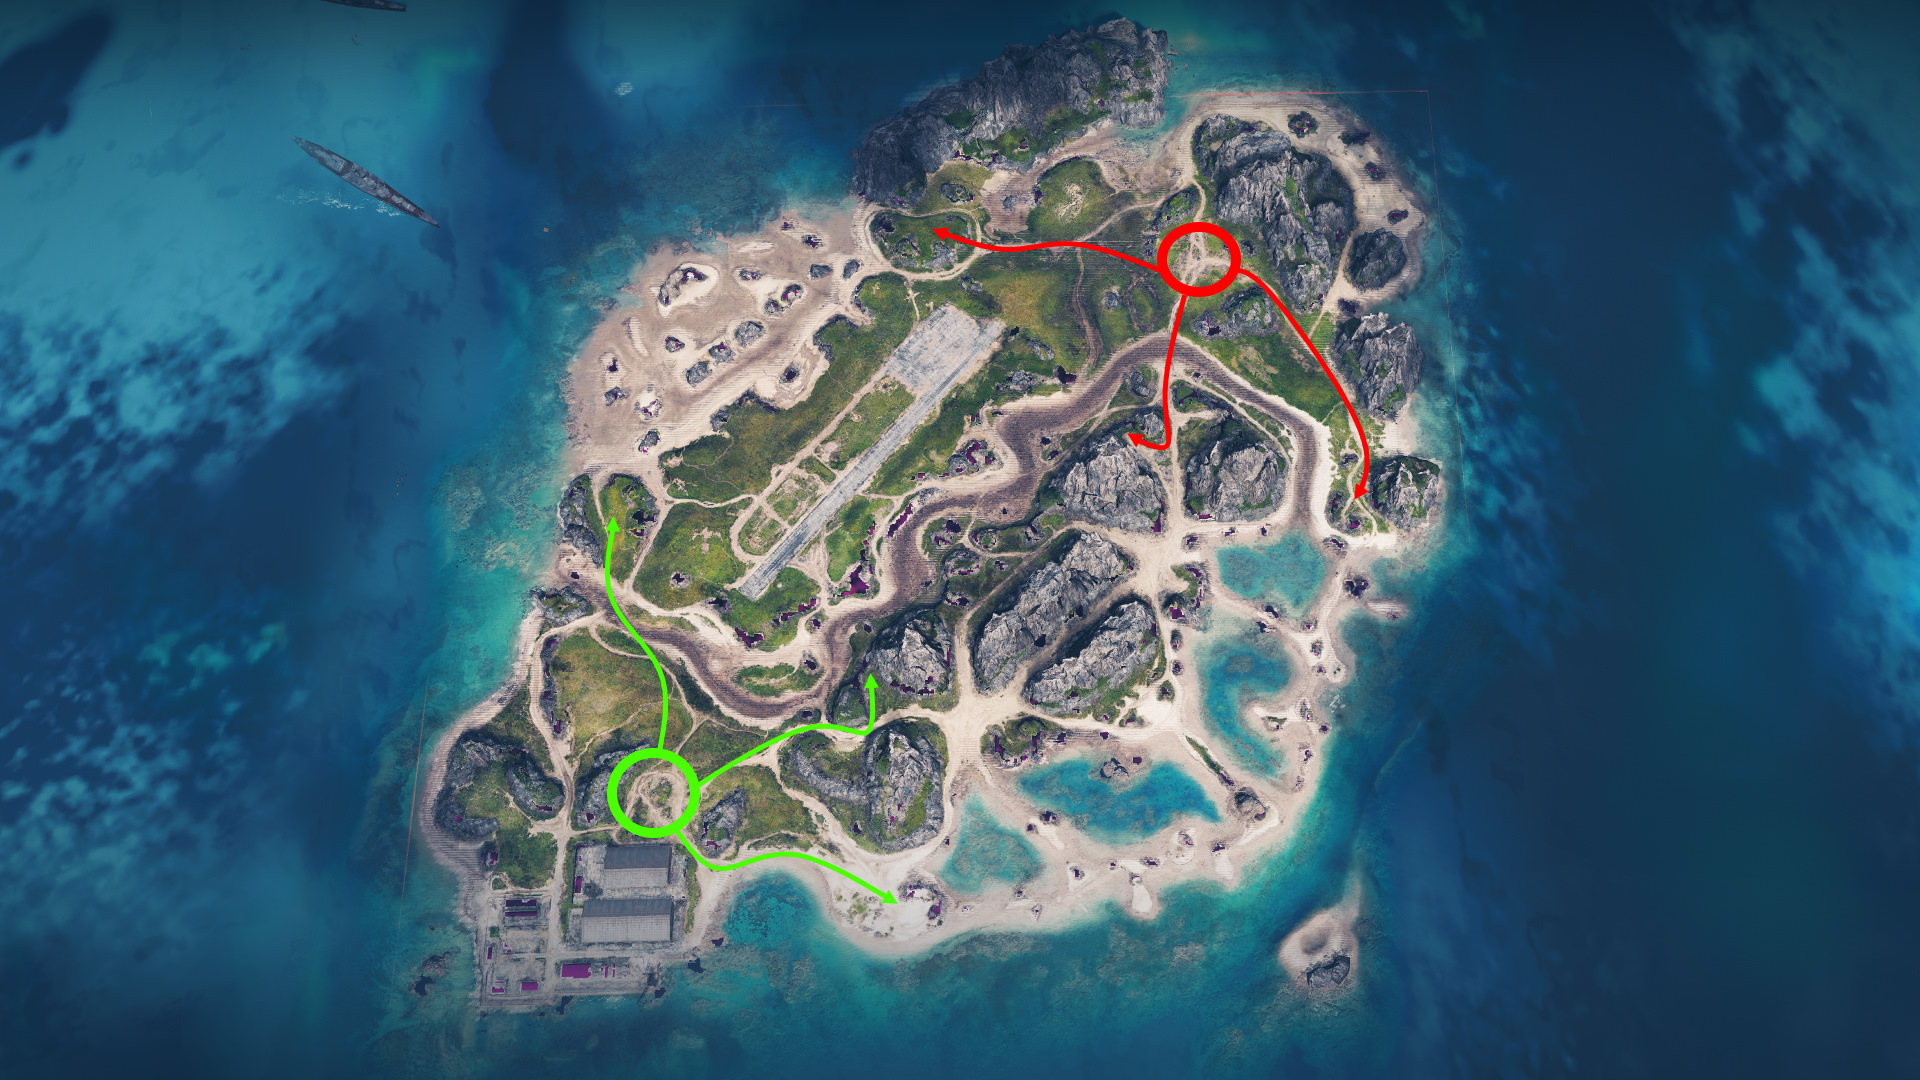
Bypass routes behind the bases. They become important when battles come to an end.

Bypass routes behind the bases. They become important when battles come to an end.


- Light Tanks
- Medium Tanks
- Heavy Tanks
- Tank Destroyers
- SPGs

- Daredevils and hotshots can sneak along the river or use the bushes and palm trees to the left and right of the runway for active scouting.
- Passive scouts should set up camp around C6 and F3 to keep a watchful eye on both the center and the heavy and medium tank action in the gorge and the lagoons.

- The lagoon in the northeast, with its military fortifications, and the oyster farms in the southeast, with boulders and rock formations, offer plenty of possibilities for tacticians.
- The crossfire positions with rocks and bushes north (B5) and south (E2) of the lagoon allow for dynamic hull-down gameplay.
- Interesting stone formations on either side of the mountain range at F6 and H6 allow for side-scraping tactics, support for brawlers between the cliffs, and surprise assaults.
The southeast offers three excellent brawling alleys in the shadows of the mountains:
- The upper lane on the side of the airfield provides excellent sightlines into the middle of the battlefield. However, be cautious of the opening at F6, which can serve as a passage between the center and the alley.
- The central alley offers protection against artillery fire and has nice side-scraping opportunities.
- The third favorable position for brawlers follows the lane between the mountains and the oyster farms. It is the most exposed option and should only be considered once enough information about the opponents’ whereabouts has been provided by spotters.
- The area around B5 and E2 provides a variety of positions to control the northwest flank and offer support for the upper heavy tank alley (F6):
- Tank destroyers with high camouflage values and good view range should take advantage of bushes for spotting.
- Those with superior gun angles will want to seek more open positions to maximize their shooting capabilities.
- Positions in E9 and J5 can prevent medium tanks from flanking through the oyster farm and heavy tanks from breaking through the mountain range.
- Take position at E7 and G5 to take out spotted enemies in the middle of the map and punish careless tankers in the northwest later in the game.
- H1 and A8 are “last stand” or emergency fallback positions.
- Nice sunny beaches and shores are located all around the island, offering excellent positions to cover the center and sides of the map.
- Settle at A6 or G1 to provide cover fire for heavy tanks brawling the upper alley between the mountains.
- The central brawl alley can only be reached with an excessively high shell arc. You usually find easier targets in the lagoon and oyster farm areas.
- The well-protected positions behind the team bases make it harder to get destroyed, but the tradeoffs are longer shell travel times and limited areas to fire upon.
