It will eventually also all be in a subforum in The Hatch, with some 'in-depth' items being linked to in separate detail pages. In order to not overload people with awesome information, we're releasing some of the more interesting (and longer) parts in installments.
The first one is 'use of cover'. Basically, what is a hull down position, a keyhole position, and how to use it.
Use of Cover
The best way to survive for any length of time is to not get hit in the first place. This can be accomplished by either being a moving target, which limits your own offensive capability, or by simply taking advantage of the terrain features around you to reduce the exposure of your tank. The less of your tank which is visible, the harder it is to hit. Even if the enemy takes the time to properly aim, the dispersion of the gun may well result in a miss anyway. First, we’ll look at the theory, and then the practical application in World of Tanks.
Cover is defined as “shelter or protection from enemy fire”, and in practical terms means “something which will stop an otherwise well-aimed projectile from hitting you”
The two main types of firing positions are defilade and keyhole. In defilade positions, tanks are vulnerable from the flanks and to enemy overwatch fire. Keyhole provide greater protection by taking advantage of terrain features that create a “keyhole” around the position. Ideally, employ a combination of defilade and keyhole positions whenever possible to take advantage of their respective advantages and negate their weaknesses
These are the three main defilade positions as described by FM 17-98, the old Scout Platoon manual for the US Army (The current version is not approved for public release!):
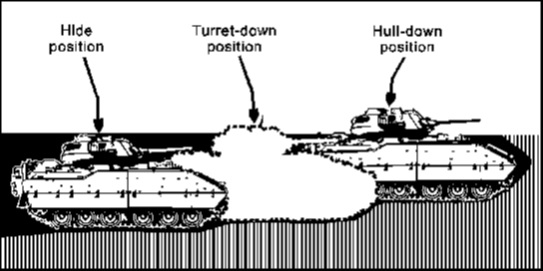
HIDE POSITION
In this position, the vehicle commander hides the vehicle so that no part is exposed to the front. This position is used when enemy engagement is not imminent and stealth is desired or when a vehicle is moving to avoid direct fire from an undetected enemy.
TURRET-DOWN POSITION
In this position, the vehicle commander halts the vehicle when the entire vehicle is behind cover but the commander can still observe the assigned sector from his position. The turret-down position is used when enemy engagement is possible and stealth is still desired. When engagement is required, the vehicle moves into a hull-down position at the direction of the vehicle commander.
HULL-DOWN POSITION
This position is used to engage an enemy element. The vehicle commander halts the vehicle as soon as the gunner can view and engage the target area. The rest of the vehicle remains behind cover.”
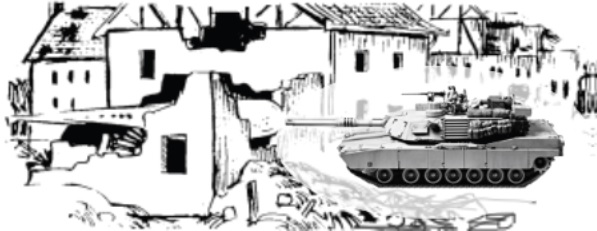
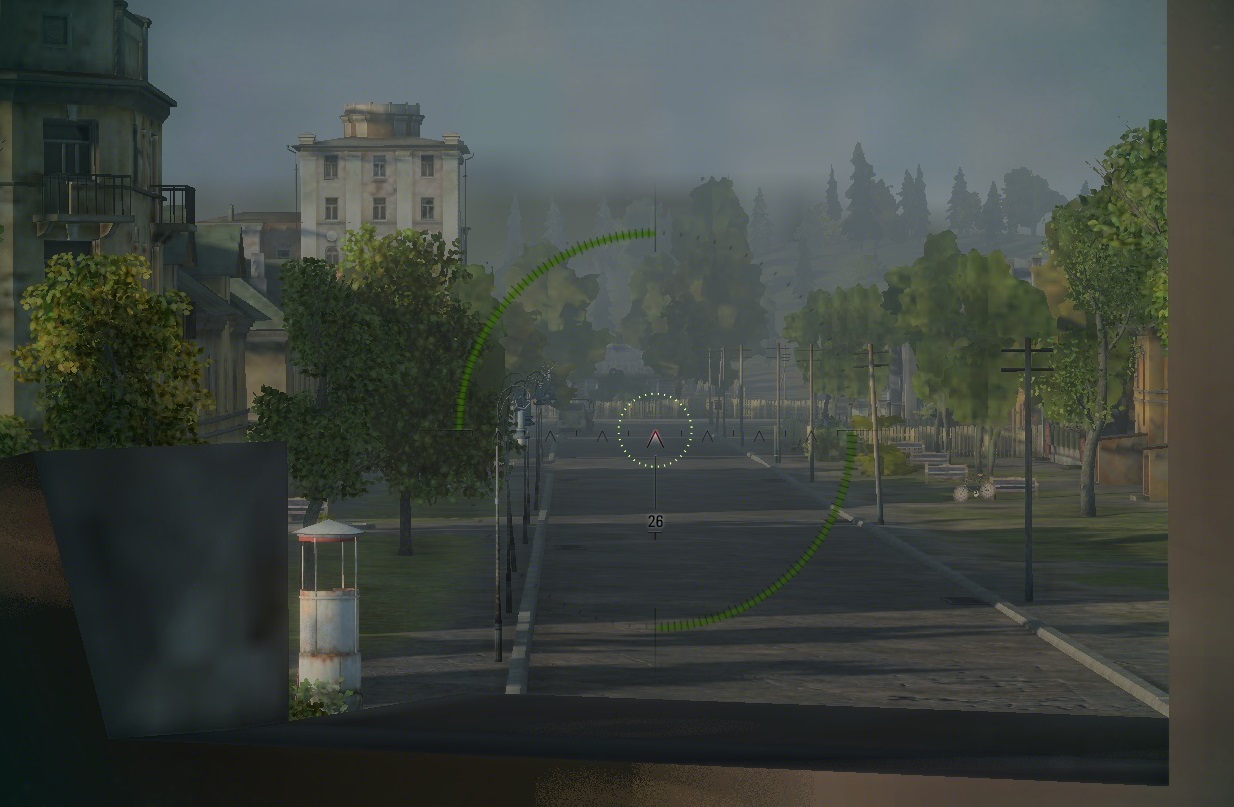
Hull-down need not mean that the tank is lower than the ground on hills or in dug-in positions. It works in towns too.
Urban Hull-Down
So, keyhole positions: These afford the firing tank a measure of protection from enemy overwatching fires. They restrict observation, and thus limit vulnerability to only one segment of the platoon’s engagement; therefore, only those targets that can be seen (and engaged) by the tank can return fire on it. Moving into or away from the opening to the position can vary the width of the field of fire.
Keyhole Positions
So much for the theory. How does this work in World of Tanks?
Actually, quite well.
For the spotting mechanics, there is a visibility checkpoint at the very top of the turret or cupola if present. This represents either the roof-mounted gunsight, or the commander’s visibility. As a result, turret down positions do work.
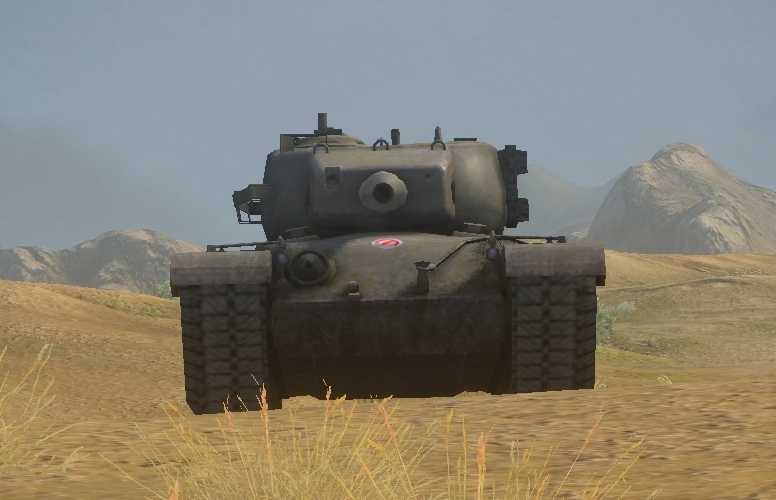
Turret Down

The T32 in the picture above is exposing purely the commander’s cupola. It has a complete and unobstructed view of the battlefield in front of it, whilst, at the same time, providing a very small target for enemy vehicles to shoot at. Further, if it weren’t for the big red icon on top of it in the game, it would have been very easy to overlook to begin with in a rapid scan. Use a turret-down position to gain situational awareness, spot targets (particularly for artillery) and to do an initial lay on the target. (i.e. aim the gun in the right direction so that you don’t waste time exposed).
Hull Down
You don't want to see this in your gunsight. The vehicle has moved forward up the slope to such an extent that the gun has cleared its line of fire, but no more of the vehicle is exposed than is required to do this. The gun now has a full view of the target. The ‘sniper’ view is positioned as if the gunsight were in the gun barrel itself: To determine if your gun has cleared the berm, move to sniper view. As soon as you can see your target, you know your gun has cleared. Now the gun has a full view of the battlefield, but still only half of the vehicle is visible to the enemy and exposed to return fire. The other method, when using the 3D view, is to move forward slowly until the impact reticle 'snaps' onto the target.
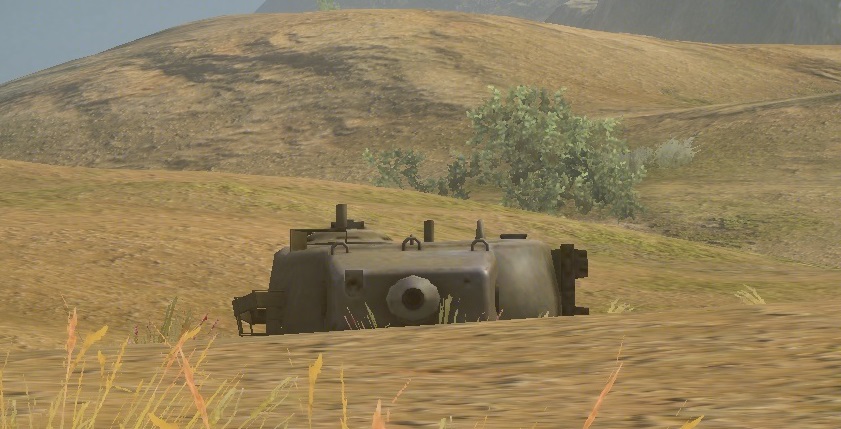
Exposed
Compare the above picture of a fully-exposed T32. The vehicle is now hugely vulnerable to return fire, but gains no benefit in terms of its ability to shoot the viewing vehicle whatsoever. Plus, the lower hull is less well armoured than the upper hull on most vehicles, meaning that not only are you easier to hit, you’re also easier to kill.
Remember that picture a couple of pages back of an Abrams in an urban hull-down position? Again, it works very well in the game.
This T32 can cover the entire street from this position.
However, while enemy on the entire street can certainly see the T32, they have two very distinct problems.
The first is, again, that the target is very small and thus hard to hit to begin with.
The other is that the weak point of T32 is the hull, particularly the side hull.
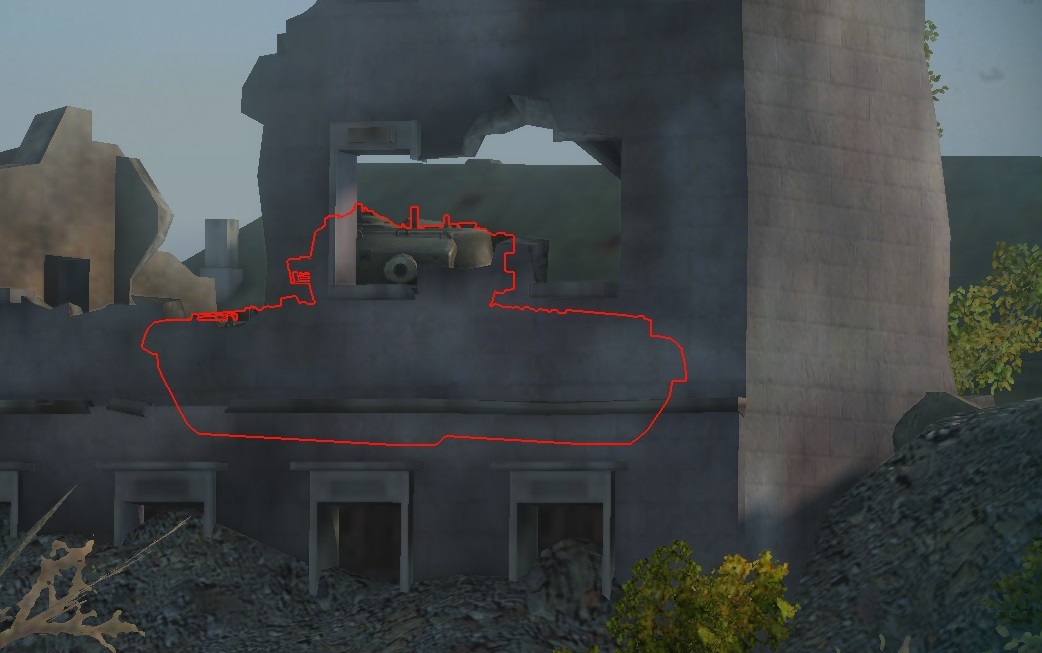
This demonstrates how the weak point of the tank is protected from engagement. This means that pretty much the only place on the T32 which can be hit, even if they do hit the small target, is the best protected bit, with all 298mm of steel protecting him.
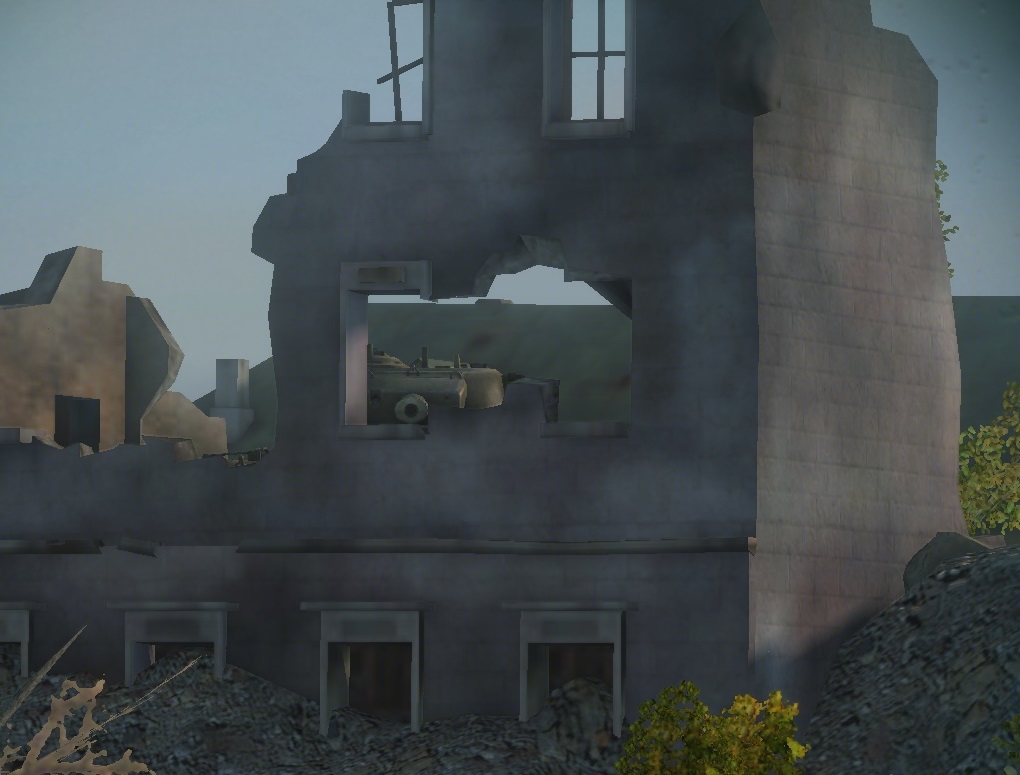
Although opportunities for keyhole shots are most easily found in urban terrain, judicious use of the environment means that you can find such positions on almost every map.
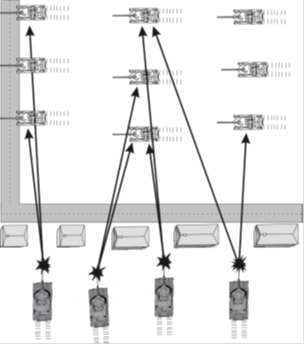
Keyhole Position
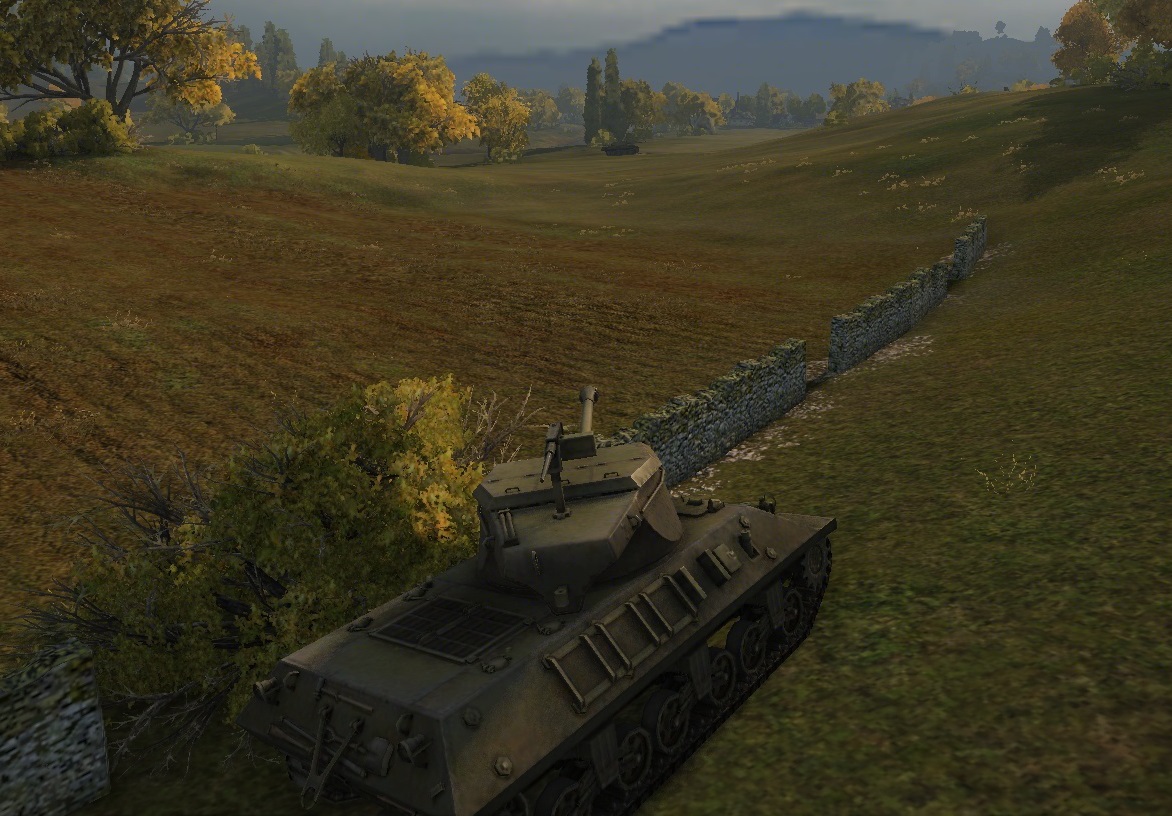
Keyhole positions are useful for ambush only, they cannot normally be used to support an offensive movement as the field of fire is quite restrictive. However, the advantage is that only enemy vehicles in that restrictive field of fire can engage you in return. As a result, keyholes allow you to isolate one or two enemy tanks from the masses and engage a superior force sequentially. Most ideally, a keyhole position will be oriented to the flank of the enemy’s most likely route of advance, allowing the ambush to hit the vulnerable sides of the enemy vehicle and further reduce the likelihood of supporting enemy tanks from being able to target you. The M36 in the picture above has a flank shot on the Panther moving left to right, but the enemy’s heavy tanks which are supporting the scout are behind the hill to the left and thus cannot engage the M36
You need to be quick on the trigger, though, as the picture below shows, the Panther is only vulnerable for as long as it takes it to drive a few tank lengths.
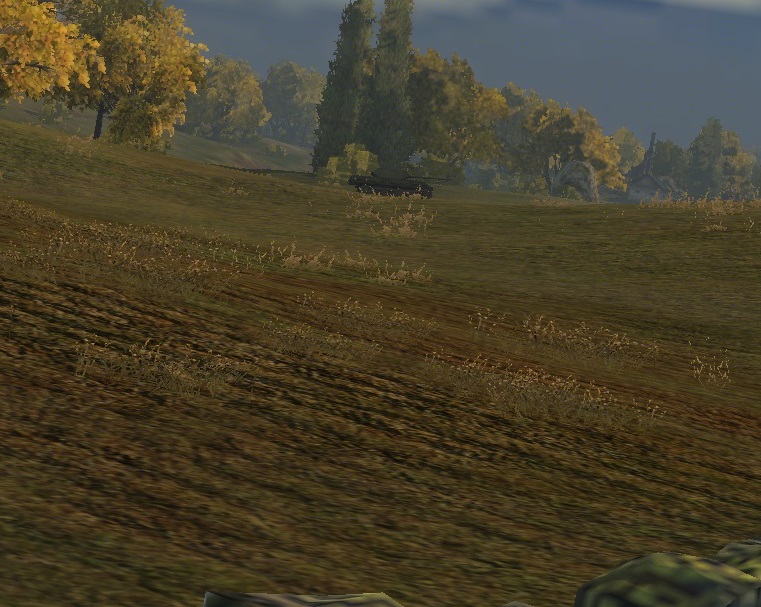
Bear in mind that like any ambush position, keyhole positions have an expiration date. Once the initial engagement is complete, expect the enemy to know where you are and action accordingly. If the M36 above has no friends providing observation over the hill to its left, it can expect a couple of heavies to come over the hill and engage it at point blank range in a minute or two.
